


In one of my previous posts I displayed photos of the Crochet Missy Stripey Pencil Cases that I had made which included some loose instructions. This post seems to get a bit of traffic so I though that it would be helpful for some people to have better information. Which is why I have decided to make a photo tutorial to answer any questions some people may have.
For those of you that prefer a quick brief, then refer to my previous post.
I have made quite a few of these, some finished some not.


Crochet Missy Stripey Pencil Case – Tutorial
Yarn: Bendigo Woollen Mill 8ply 100% Cotton Hook: 3mm Extras: 25cm Zip, Fabric for lining, needle and thread. Terms: US Pattern Notes: You can make this as tall as you like, with stripes as big as you want and with or without stripes.
- CH 50 and turn
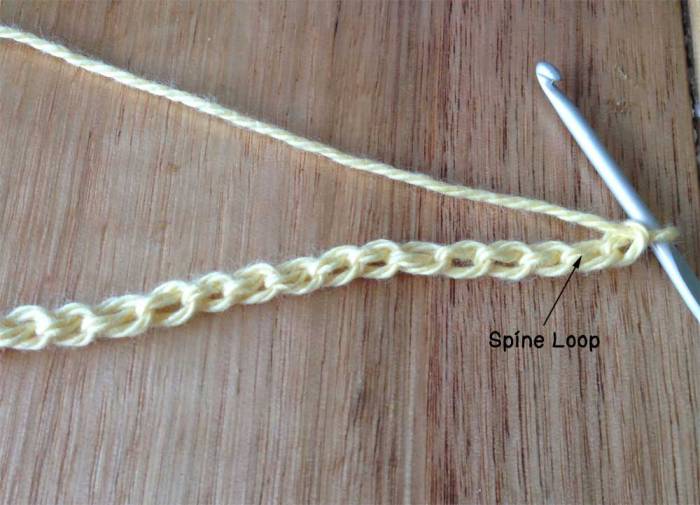
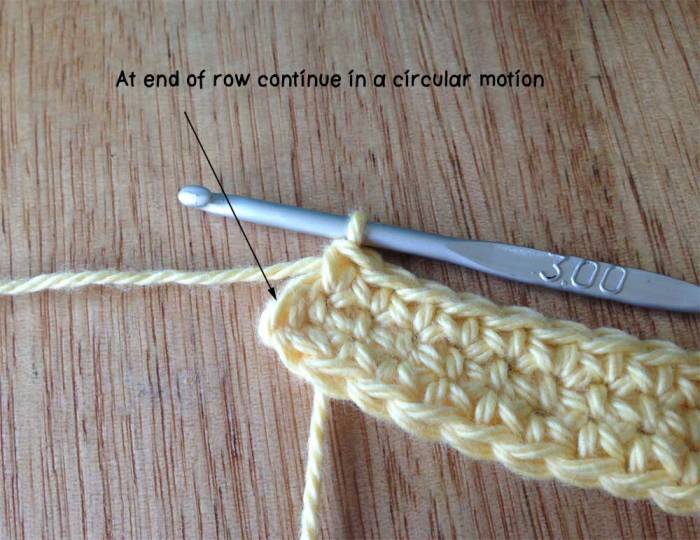
- Turn your work over so that you can see the spine loops instead of the “V’s”.
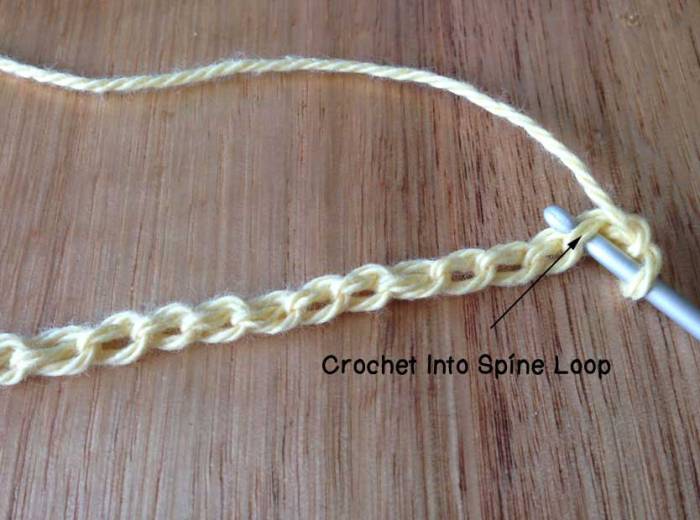
- Crochet into the second spine loop from the hook.
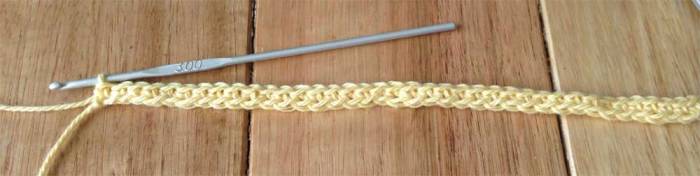
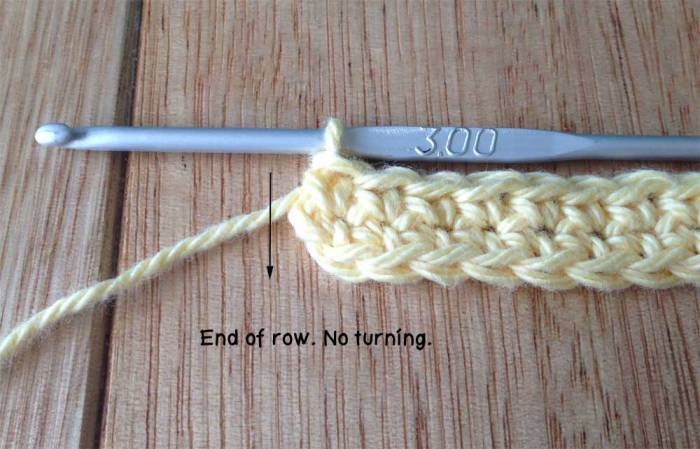
- Continue to the end of the row crocheting in the spine loops. Do NOT turn.
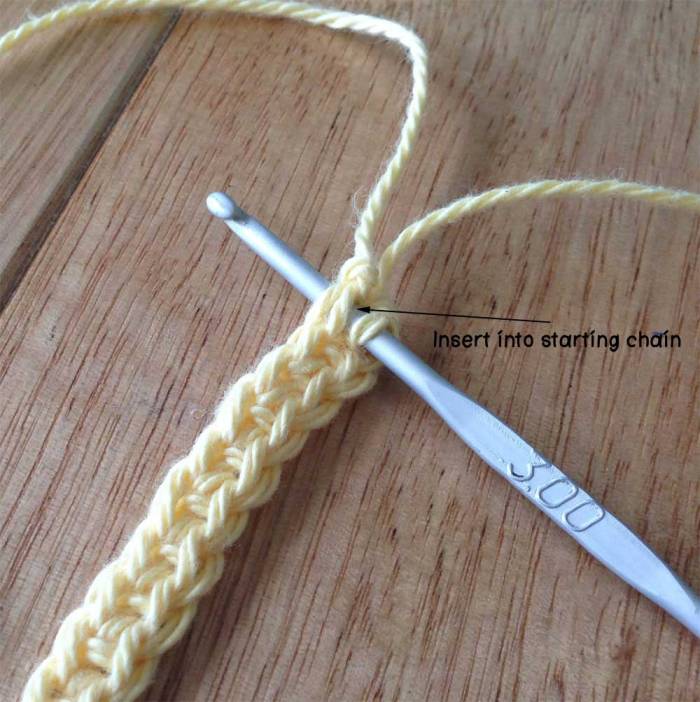
- Now you will be working in a circle. Insert your hook in the starting chain and complete a single crochet. (The starting chain is the bottom row).
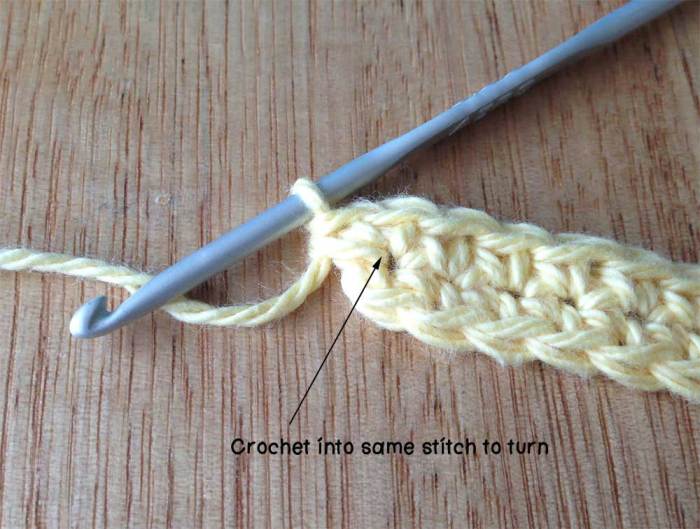
- From this point you will be single crocheting in the usual manner but will not turn at the end of a row. (Usual manner means into the V’s)
- Continue with SC to the end of the row but do not turn.
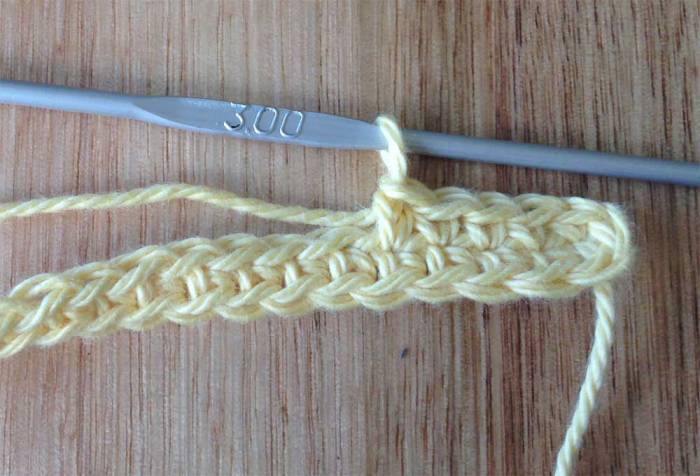
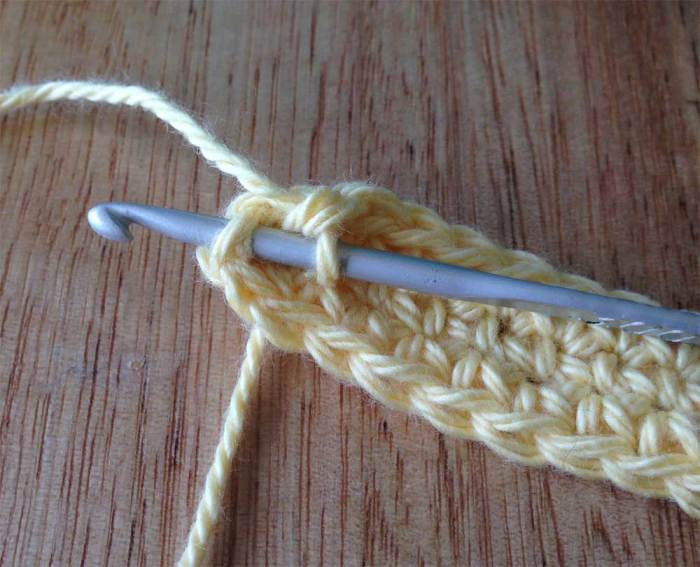
- At this point we will be turning the corner. To do this I add in an extra stitch so that it doesn’t get too tight. SC into the same place.
- SC into starting stitch of other row.
- Continue in this manner to the end of row. From this point there will be no extra stitches included.
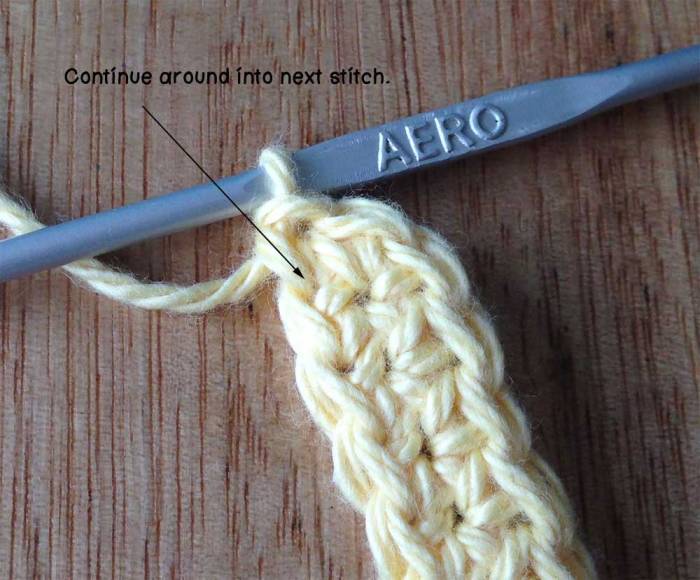
- SC into next stitch down and continue around to next end.
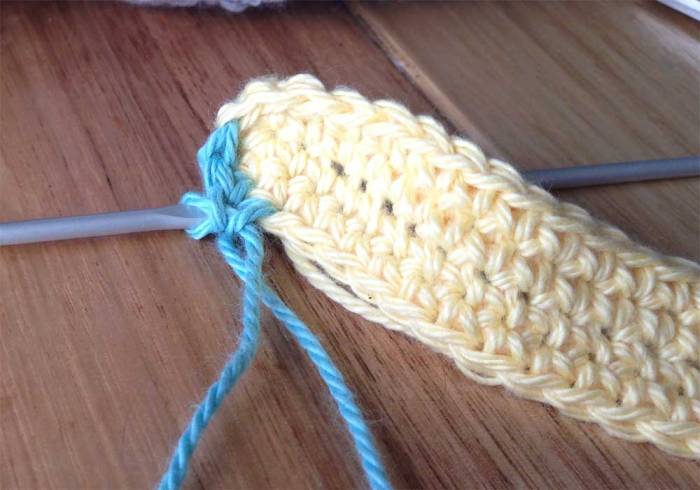
- Once at end *change to Colour 2 and continue around in a circular motion.
- Once you reach the start of Colour 2 continue SC over the top for one more circle, then change to Colour 3.
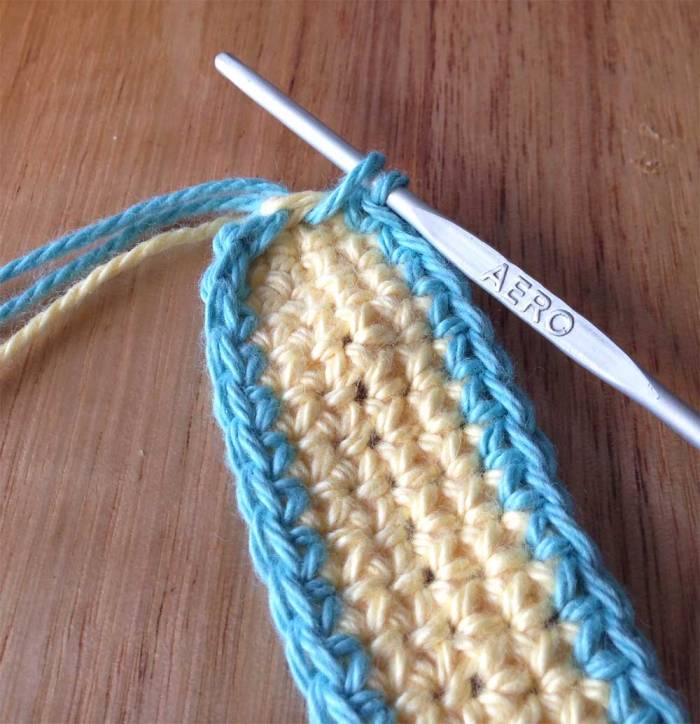
- From this point on you continue in the same manner. I have changed colour every two rows (or circles) and I have used three colours. There are 21 rows in total and each colour is represented in three stripes except for Colour 1 which has four.


This is the end result.

*Change Colour – To change colour I yarn under, grab and pull through. This is half of a single crochet and you should have two loops on the hook. At this point I attach Colour 2 by yarning over with it and pulling through the two loops. Now your colour is joint!
Extras –
Zip:
To install the zip, pin it into place and then use a needle and thread to connect it to the crochet.
Lining:
I cut the fabric to the correct size and then hand sew it to the crochet.
For more precise instructions visit the tutorial at FutureGirl, she has put together a very nice and detailed tutorial on how to do this.
Flower:
Use any flower pattern you want. One of the patterns I used was from Solgrim, which includes a photo tutorial. I had to create a smaller row of petals on the inside to make it small enough for my purposes.
That is it. If you have any question please let me know and I will update the tutorial. Also, if you enjoy making this then you could also make the Book Bag which is essentially a taller version of this with a handle.
Enjoy


Lovely, on my to try list.
I would certainly like to see one if you did. Recently I cut up some old tshirts (haven’t got to the sheets yet) and did a little rug test. I didn’t make it far through but it just makes me appreciate yours even more.
Awwh thank you for that.
It is a lot different from using yarn that is for sure. 🙂 Julianne
Pingback: Crochet Missy’s Stripey Pencil Cases | Crochet Missy
This is a very clear tutorial. Thank you.
Hope it helps.
Pingback: How to Crochet a Pencil Case | Dorkably Designed
I need to pick up a hook and yarn and give this a go! Thanks for being so inspiring Missy
No problem!
Pingback: Free Crochet Pencil Case Tutorial | Trendy Crochet by Dorkably Designed
Thanks for posting this Missy. I’ve always loved your crochet pencil cases. I’m going to give this a go over the holidays. x
That is great. I would love to see your finished product.
Pingback: Yet another pencil case! | Crochet Missy
Really love this case, but how do you add in the extra stitch? When you go around the next row do you put the hook just through the right side of the stitch or under both sides of it? I guess I am confused. Do you know if there is a video of this pattern or method? Thank it’s really great but need more specifics.
Hi Mally. Nice to hear you feedback. I think it is point 8 that you are stuck at? To add an extra stitch you just put your hook under the same “v” as the previous stitch. This makes two stitches in the one hole. The only reason I do this is so that the corners don’t get too tight. It would be perfectly OK to ignore the extra stitches and the case will work out fine. The extra stitches were only for that first row.
There is probably a youtube video somewhere on how to do this. Youtube is where I learnt to crochet 🙂
Good luck and if you are still having trouble let me know and I will create you a video 🙂
So my advice is to ignore those extra stitches and just keep working around in a circle.
Hi,
Thanks for explaining. I think where I am also stuck is the picture above #11. I can’t tell where your crochet hook is in that picture an it’s tripping me up. A video would make things so much clearer for a novice crocheter like me. If you could do one I would be forever grateful! You do such beautiful work! Is this an original design by you? If so, you are very talented! Thank you so much for doing this.
You are very nice 🙂 I did design them but I am positive that there would be plenty of other people that have created this before.
I have now put a video tutorial on my list but I am not sure when this would be done so in the interim I will try to update my photos to be more helpful.
In regards to #11, my hook is just in the stitch indicated by the pointer in photo #10. This is just indicating that you are turning the other corner (or end of rectangle). So even though the piece looks like it is a rectangle it will start to grow upward instead of wide because there will be no more increases.
Just remember it is a very simple design. Just imagine you are stitching around and around in circles. Just try what you think is right and see how it turns out. If it doesn’t work unravel a bit then try again.
Thank you again for your feedback.
Thank you for the explanation. You’re right, I need to just dive in and not be afraid to make a mistake! I am going to try and get some of that yarn. The case and purse look great in your photos.
The yarn is fabulous. It feels amazing! They are also 200g balls, nice and big.
i believe you mean “manner” not “manor”. thanks for the great pattern though! 🙂
Haha. Thank you very much. My English has always been a bit flakey and I had no idea that I had used the word “manor” so much! Hopefully they are all taken care of now.
If you see anymore issues I would be more then happy to know about them.
Thank you again and I hope you enjoy the pattern.
thank you this is a great pattern
Pingback: 20 Free Back to School Projects to Crochet | Imagine
Pingback: Free pattern for easy crochet pencil case – perfect for back to school |
Your pencil case looks wonderful! I especially like the skull that you included. Great to see that the instructions worked for you and that you have adjusted it to your needs. Fabulous.
Crochet Missy.
Missy, I looked all over the internet for a simple pattern for a pencil case and yours was the best I found. The picture tutorial was very helpful. I included a link to this page on my blog. Thank you so much for your post and for the free pattern.
That is wonderful to hear. Simple is exactly what I was going for. It is my go to project when I need something to make without much thought (when watching a movie).
I like the changes you made and especially your flower replacement!
What is the name of the stitch you use for the pencil case? I’d like to use it to make a blanket.
Hi Nicole. The stitch is just single crochet. The reason it looks a little different is because it is all worked in the one direction, which gives it the flat look.
The only way I can think to do this in a flat object like a blanket would be to either cut the yarn at the end of the row and start from the original end or change colour and start from the original end. It would be wonderful to see if you do make one.
Good luck.
Crochet Missy.
thank you for a great pattern